Making Edits in Cart Designer
Making Edits in Cart Designer:
Login to your cart Admin and navigate to the Design button the bottom left. Click and then enter Cart Designer. Once there you will notice your site is still functioning as if it were the live front end, meaning you can navigate from page to page and product to product.
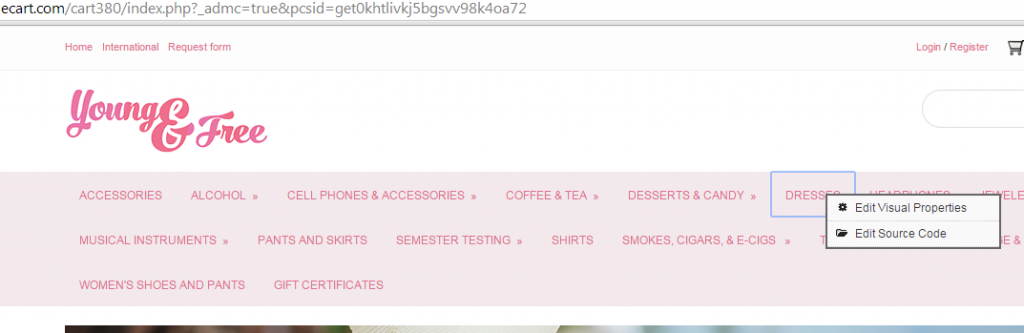
Step 1.
Find an area that you would like to edit and right click. You will see a few options, such as Source Code, Edit Visual Properties, and sometimes based on the template or area of the template WYSIWYG (What you see is what you get). For this example we’re selecting Edit Visual Properties
After you select Edit Visual Properties you will then see a screen like the following:
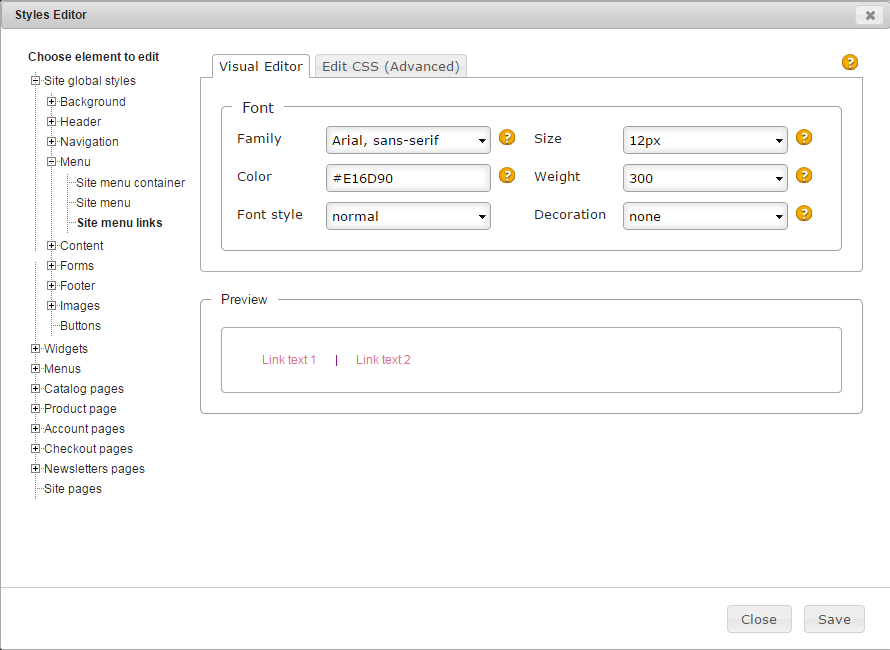
Step 2.
Now we’re in the Styles Editor we can find each area that we want to change, and for our example above we’re changing the Menu>Site Menu Links. Now I’ll walk you through each of the changes we can make on this screen with the area that we have selected:
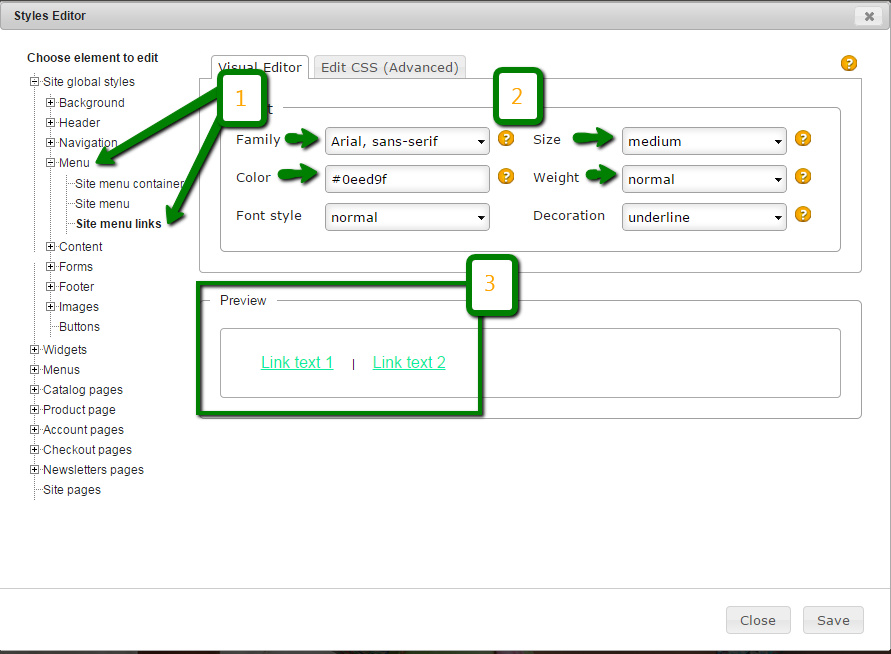
1) These are directing you to the area that we have just selected when opening. You’re not limited to what you can edit, you can go through different areas of the page and change them as well while you have this open. These are just mainly highlighting what we’re currently demonstrating.
2) This is where you make the actual changes.
- Family: The style of your font, you can click here to learn more about Font Families. This will give your font a life of it’s own and add more style to your site if you wish
- Size: This is always important, too small and your customers won’t see what they’re looking at, too big and it spreads your site out and makes it to bulky.
- Color: Here you can use Html color codes that will give you that specific color you’re looking for. Click here to find out more.
- Weight: This is something that is like making your text either a heavier or lighter view. Like for example when you’re using MS Word and you select Bold for your headline. Click here to learn more about Font Weights.
- Font Style: This is where you can add that Italicize effect to your lettering or make your text inherit. Click here to learn more about Font Style.
- Decoration: You will be able to give your Font the underlying effect or strike through, providing a little extra. Click here to learn more about Font Decoration.
3) This will give you a preview of your changes before you save and move on. This will give you an idea of how the size and look will be once you hit save.
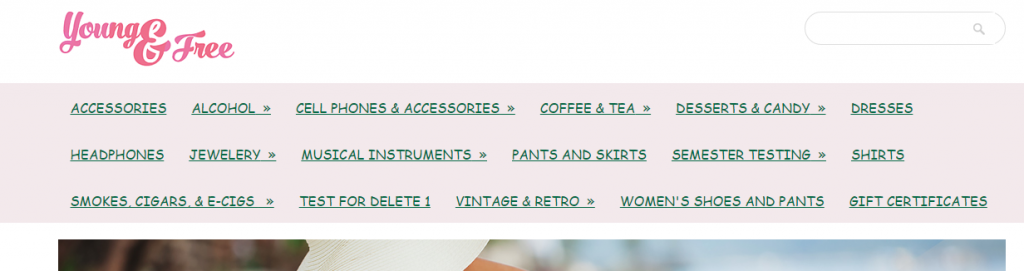
So now we’ve made our changes here is what the example looks like:
Using The Editor isn’t the only option you have when making edits to your Site through Cart Designer. I like to use CSS code directly. One of the easiest and fastest ways to do this is using a different browser and I prefer Fire Fox with the addon Fire Bug. For more info on how to use Fire Bug click here.
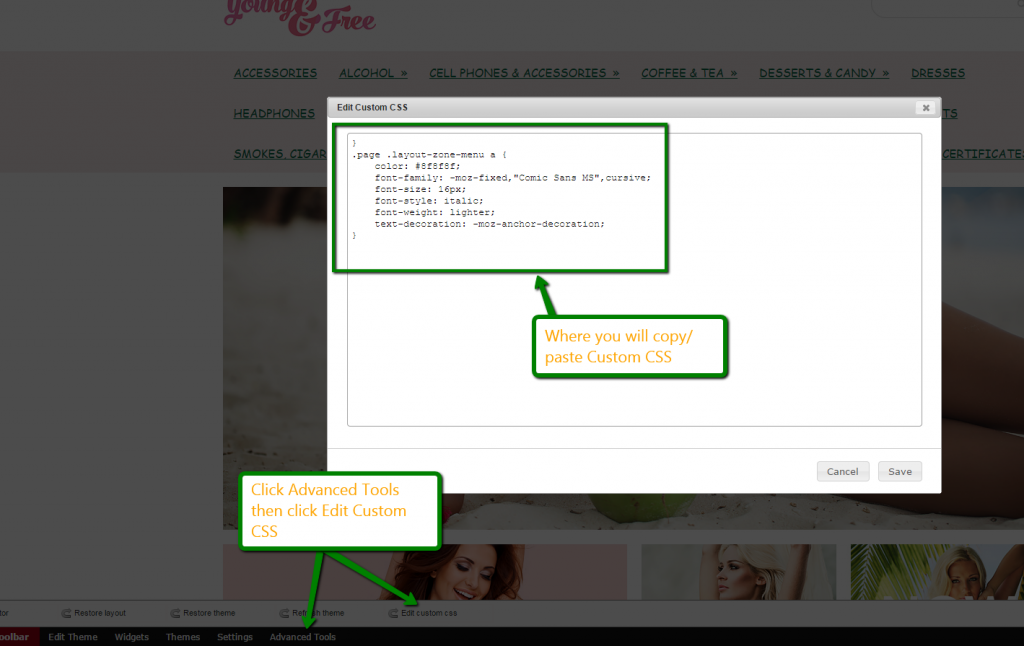
When you’re in the Cart Designer navigate to the bottom menu Advanced Tools>Edit Custom CSS once there, select Edit Custom CSS then bring your site up in Fire Fox.
Now in Fire Fox use this example to get where you need to go:
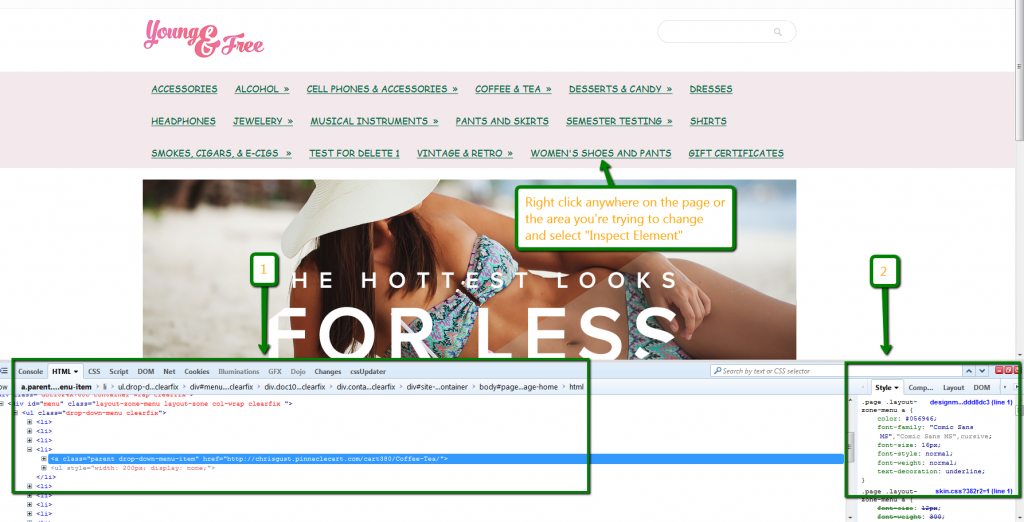
Right Click anywhere on the page or the specific area where you’re trying to make the change. Once you find what you what to change select “Inspect Element”.
1) This gives you all the lines of HTML and coding for that page and each area line by line. Highlighting or Selecting these area will give you different views on the Right.
2) This is the CSS where we can make temporary changes in the code that we will then copy/paste back over to cart in Edit Custom CSS.
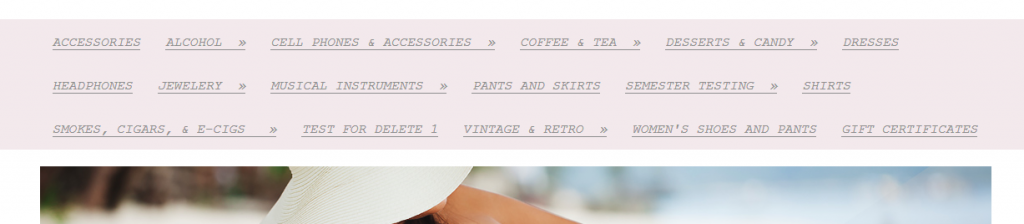
After hitting save, exiting Cart Designer, and refreshing our front end of the site by using CTRL+F5 this is what are changes look like:
If you have any further questions about Cart Designer and using Custom CSS please don’t hesitate to ask!
If you didn’t get your question answered, please contact the Pinnacle Cart Support Team. To submit a ticket, go to the My Account drop-down menu at the top right of the admin area and select Support.
0
0